Every time someone books, AppFlow adds them to your customer directory. There is nothing to import and nothing to set up: the list builds itself as bookings come in, so you always know who your customers are, what they have spent and when you last saw them. This guide covers finding customers, reading a profile and collecting reviews after a visit.
1. Find a customer
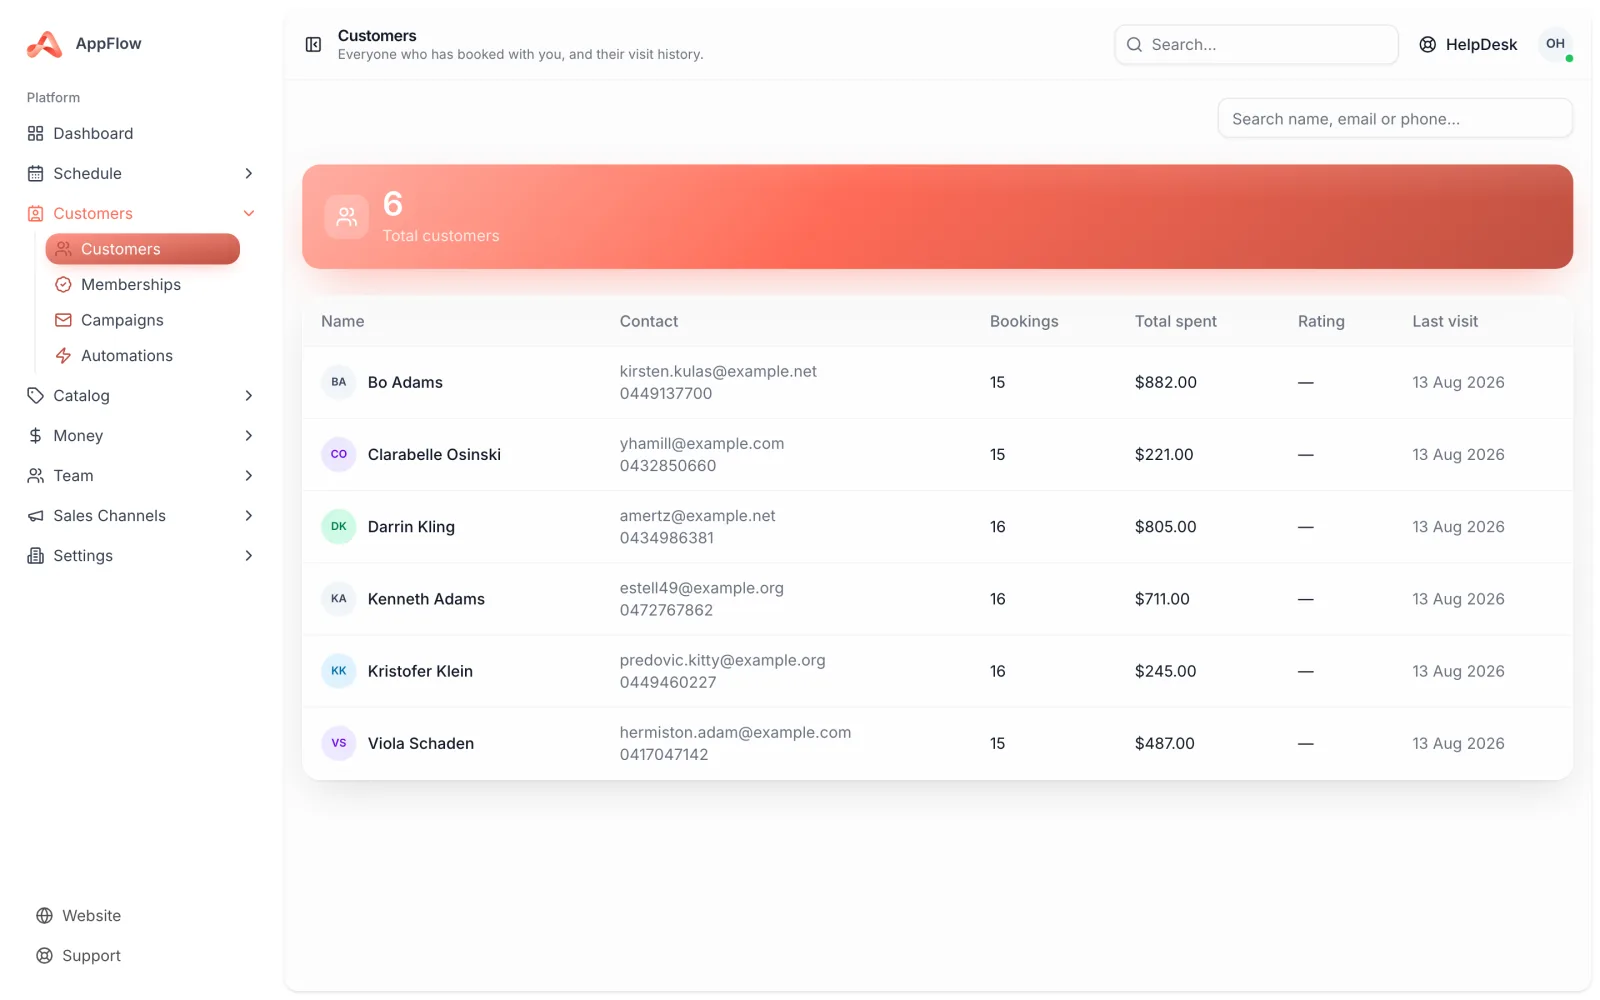
Open Customers from your dashboard to see everyone who has booked with you. The list shows each person with their booking count, total spent, average rating and last visit, so you can scan it like a snapshot of your business.
- 1
Open Customers
From the AppFlow Hub or your dashboard, choose Customers to load your full directory.
- 2
Search by name, email or phone
Start typing in the search box. The list filters as you go, so you can pull up the right person in a second or two, even from a long list.
- 3
Sort to spot patterns
Sort by total spent, booking count or last visit to find your top customers or the ones you have not seen in a while.
2. Open a customer profile
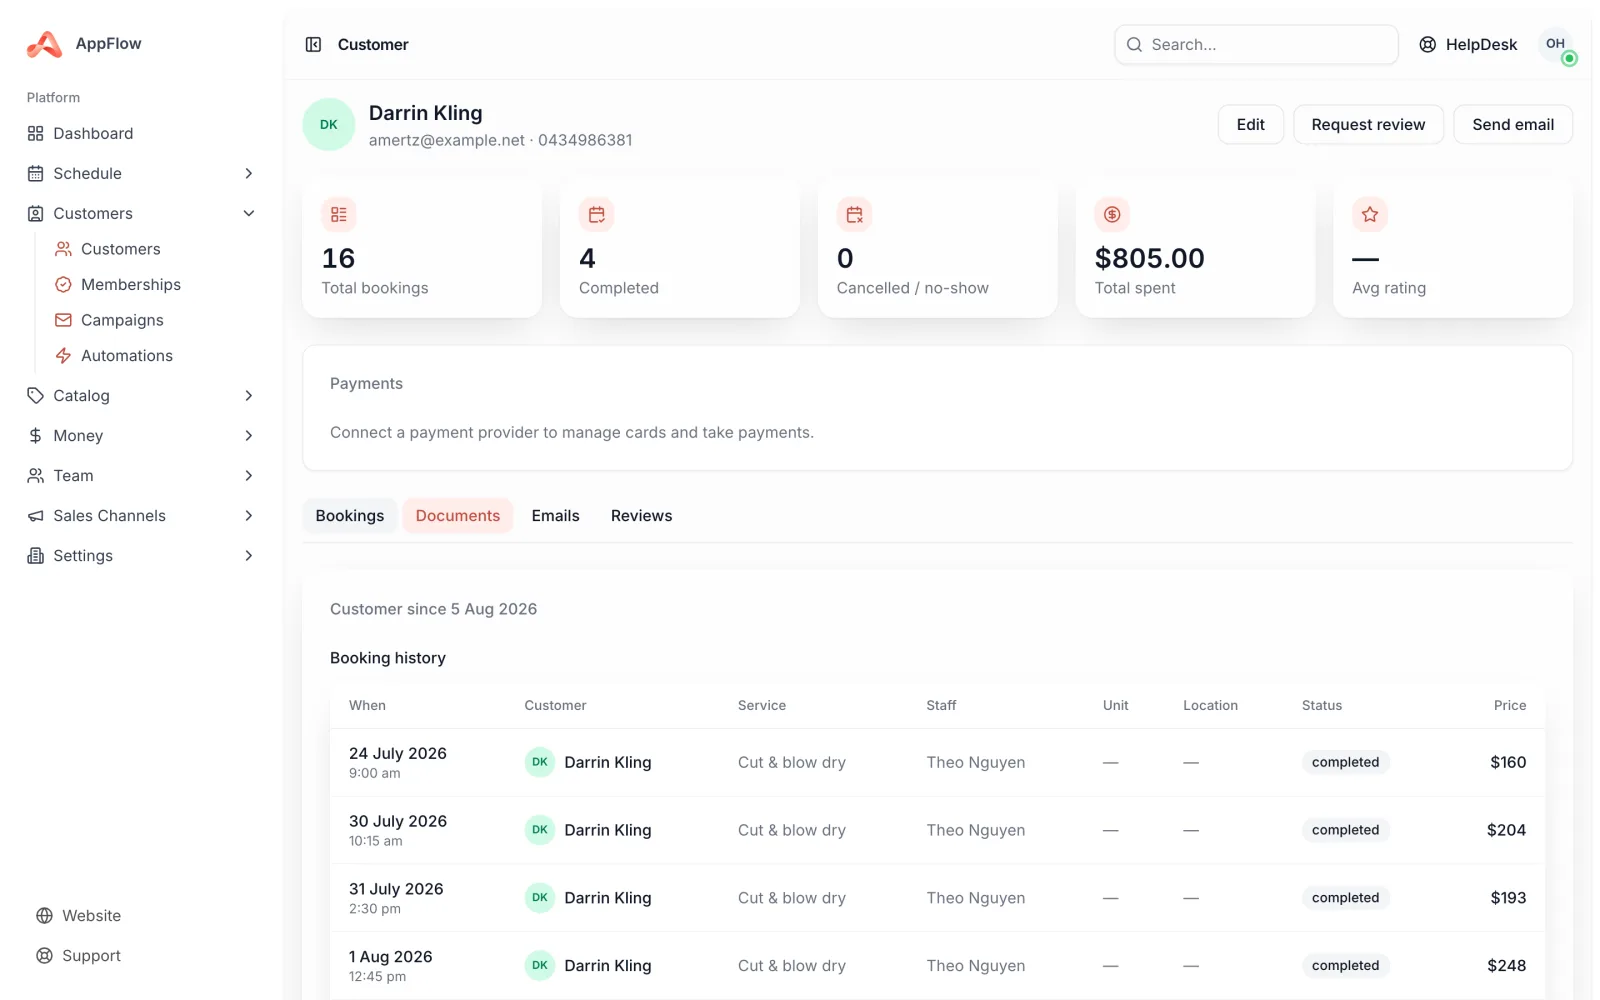
Tap any customer to open their profile. This is the full picture of your relationship with them: their lifetime stats up top, then their complete booking history and any reviews they have left.
- Lifetime stats: total spent, number of bookings, average rating and last visit
- Full booking history, including past and upcoming appointments
- The reviews and ratings they have left, tied to the visit they go with
- Contact details so you can call or email straight away
Tip
Before a regular arrives, open their profile for a quick refresher on what they usually book and when you last saw them. It is an easy way to make every visit feel personal.
3. Collect a review after a visit
After an appointment, each customer can leave a star rating and a comment through a unique link that is tied to that exact booking. Because the link is one-time and matched to the visit, you know the feedback is real and you can see precisely which appointment it belongs to.
- 1
Send the review link after the visit
Once an appointment is marked complete, AppFlow can share that customer's unique review link, so the rating lands against the right booking.
- 2
The customer leaves a rating and comment
They tap the link, choose a star rating and add a comment if they like. It takes them moments and works on any phone.
- 3
See it on their profile
The review appears on the customer's profile against that visit and feeds into their average rating, so your directory stays up to date.
4. Add the review link to your marketing emails
You can also drop the review link into a marketing email as a merge tag. AppFlow swaps the tag for each customer's own one-time link when the email sends, so a single thank-you email asks every recipient to review the visit that was theirs.
- 1
Write your email
Create a post-visit thank-you or follow-up in your marketing tools, in your own voice.
- 2
Insert the review link merge tag
Add the review link merge tag where you want the button or link to sit. Each customer receives their own unique link in their copy of the email.
- 3
Send or schedule
Send now or schedule for a little after a typical visit, so the request arrives while the experience is still fresh.
Good to know
Your team can look up any customer from the staff mobile app too, so the history and contact details are there whether you are at the front desk or out on a job.
That is your customer directory and reviews working together: a list that builds itself, profiles that tell you the whole story, and genuine feedback tied to the visit it came from. Pair it with the marketing guide to turn happy customers into repeat ones.
Was this guide helpful?
Still stuck? Contact us