The calendar is where the work happens. From one month view you create every booking, then complete it, reschedule it, cancel it, mark a no-show or reassign staff as your day changes. This guide walks you through it from start to finish.
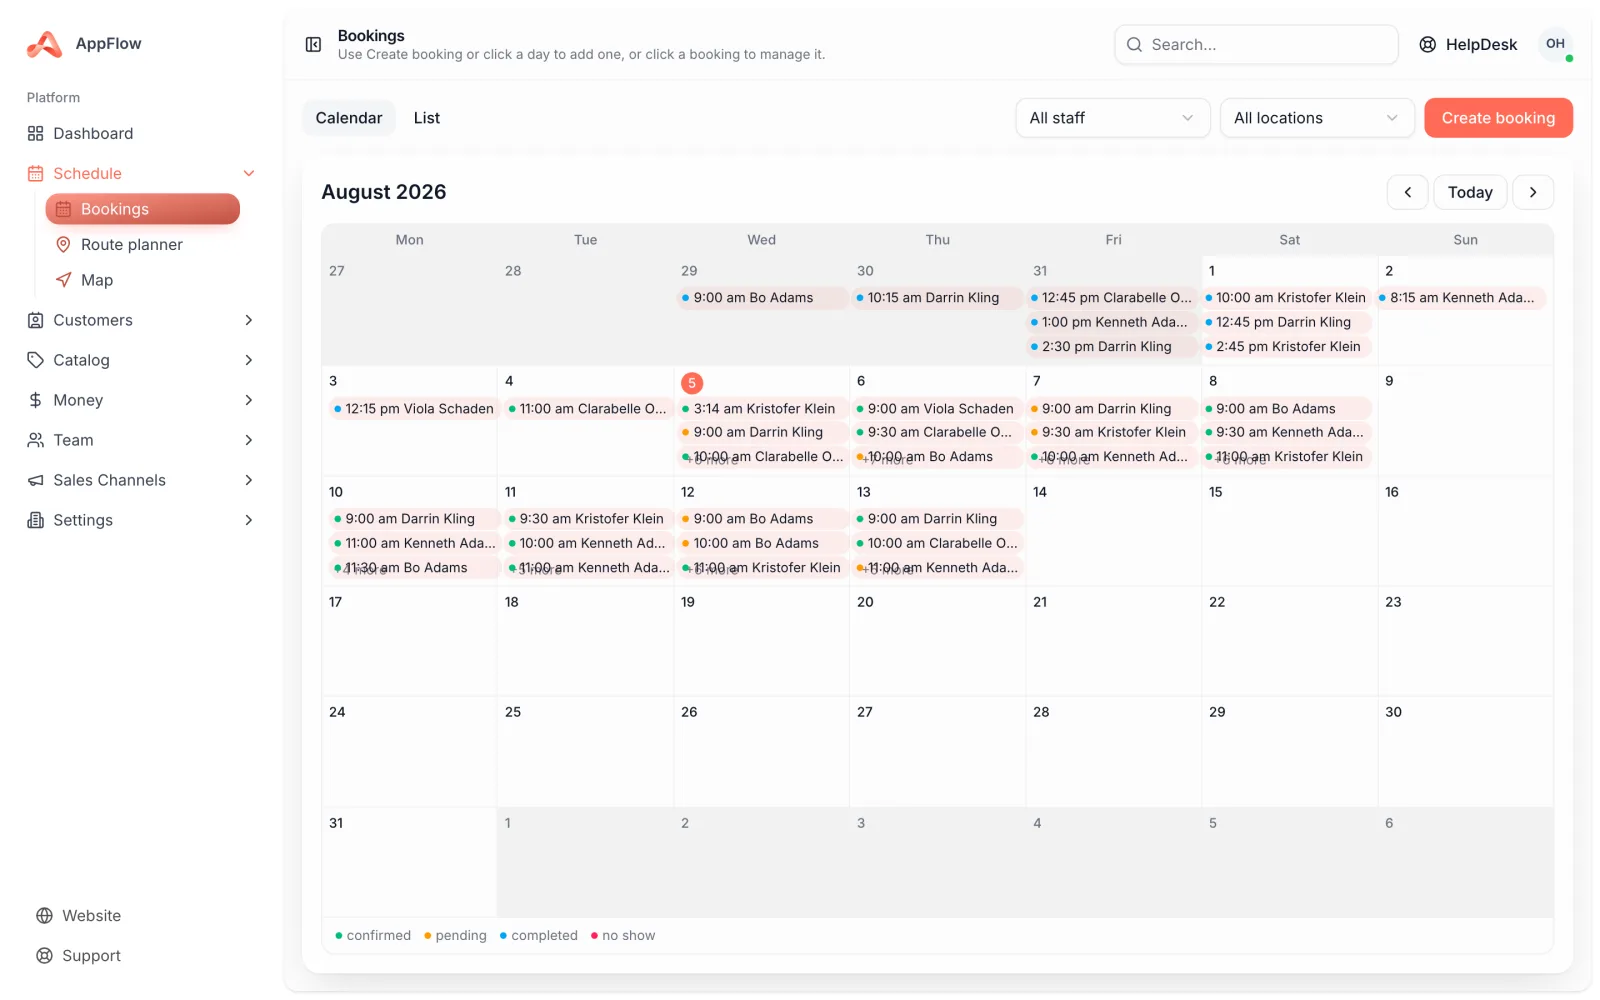
1. Create a booking
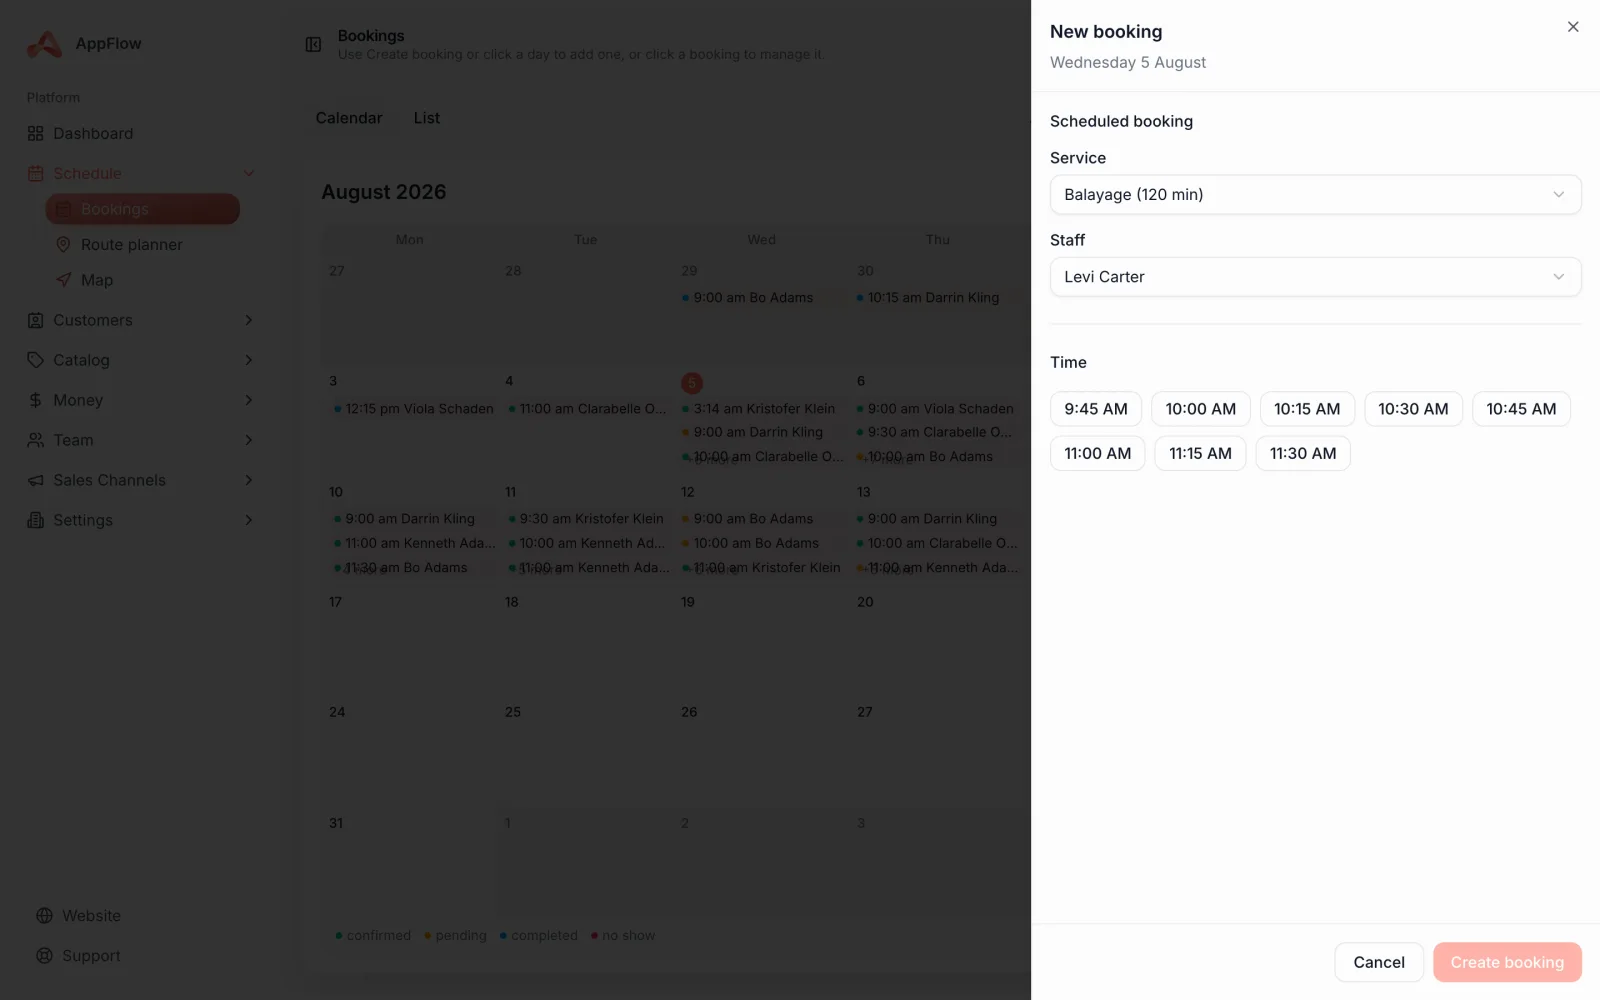
Open the calendar and choose New booking, or tap the day you want. You build the appointment in a few clear steps.
- 1
Pick the service
Choose from your service menu. You can add several services to the one appointment, so a longer visit is booked as a single block.
- 2
Add any paid add-ons
Tack on extras like a treatment or upgrade. Add-ons sit alongside the services and roll into the appointment total.
- 3
Choose the staff member
Assign the person doing the work. The calendar only offers staff who can do that service and are free at the time.
- 4
Pick an available time slot
Choose from the open slots. The moment you take one, AppFlow locks it to that staff member and re-checks for clashes, so two people can never grab the same slot.
2. Open the booking detail
Tap any appointment on the calendar to open its detail view. Everything about the visit is in one place: the customer, the services and price, payment status and the staff member assigned. This is also where you make changes.
3. Move the booking through its stages
Each visit moves through clear stages so you always know where it is at a glance, from the moment it is booked to the moment it is done.
- Reserved: the slot is booked and held
- Checked in: the client has arrived
- In service: the work is underway
- Finished: the appointment is complete
4. Reschedule, cancel or mark a no-show
- 1
Reschedule
Open the booking and choose a new day, time or staff member. The old slot is freed and the new one is locked and clash-checked the same way.
- 2
Cancel
Cancel the booking to free the slot for someone else. The visit stays on record so nothing is lost.
- 3
Mark a no-show
If a client does not turn up, mark it as a no-show. This keeps your records accurate and your reporting honest.
- 4
Reassign staff
If someone is off or running behind, reassign the booking to another staff member who can do the work.
5. Amend a booking
Plans change once a client is in front of you. Staff can amend a booking later by swapping a service for another from your menu, or adding a one-off custom line for something that is not in the catalogue. The appointment total updates as you go.
Tip
Use a one-off custom line for a quick extra you do not offer often. It keeps the booking accurate without cluttering your main service menu.
Keep services private when you need to
Some services are for staff to book, not the public. Mark a service as private and it stays off your public booking page while you can still add it to any appointment from the calendar.
Good to know
Slot locking does the heavy lifting behind the scenes. You never have to worry about a double booking, even when the calendar is busy and two people are booking at once.
Was this guide helpful?
Still stuck? Contact us