Your team and their time are the heart of the business. This guide walks you through adding your people, linking each one to a login, setting who is qualified for which services, and building the recurring hours and exceptions that decide which time slots clients can actually book. You will also set the rules that pick who takes a job, learn how to reassign work when plans change, and see how clock-in totals flow through to Xero for payroll.
1. Add your team and link a login
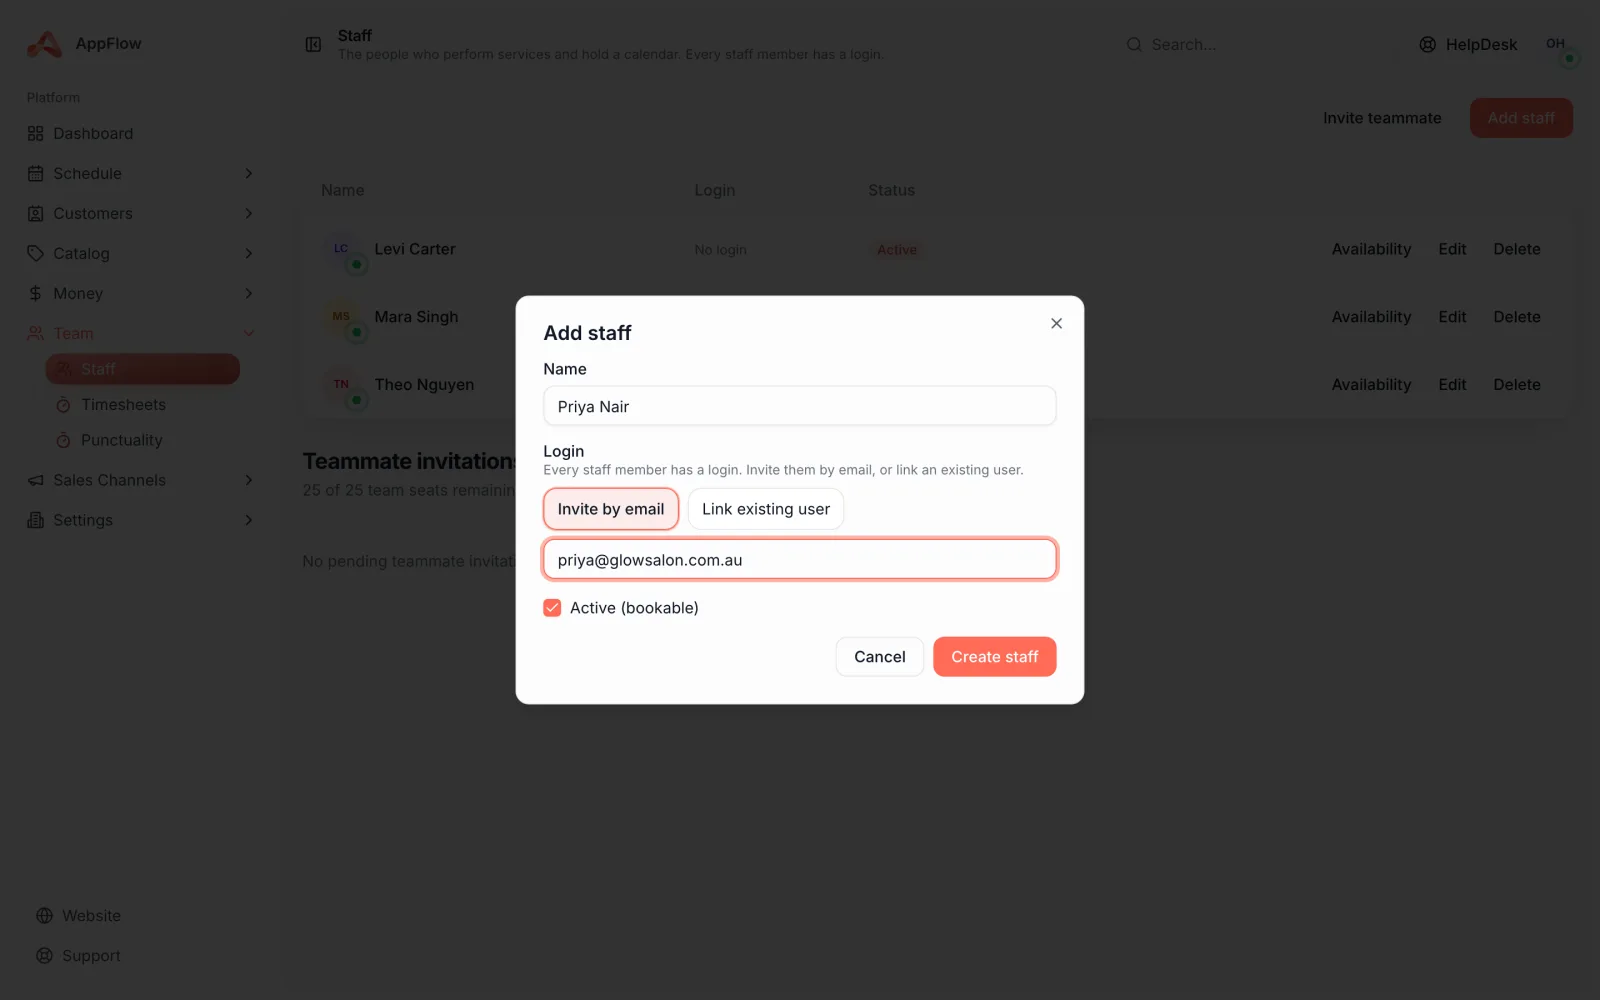
Start by adding each person who does the work. Linking them to a login means they can sign in, see their own jobs and clock in and out.
- 1
Open Team in Settings
Choose Add team member and enter their name and contact details. This is the person clients can book with.
- 2
Link a login account
Send an invite so they set their own password, or link an existing login. Owners see and manage everything, while staff see their own jobs and hours.
- 3
Save and repeat
Add everyone who takes appointments. You can update or remove a person later, and their past jobs stay on record.
Tip
Even if you work on your own today, add yourself as a team member. It makes bringing people on later effortless.
2. Set who is qualified for which services
Tell AppFlow what each person can do. Only qualified team members are offered for a service, so clients are never booked with someone who cannot take the job.
- 1
Open a team member's profile
From Team, choose the person you want to set up.
- 2
Tick their services
Select every service this person is qualified for. Leave the rest unticked so they are never offered for work they do not do.
- 3
Save the profile
Repeat for each person. As your menu grows, come back and tick any new services they pick up.
3. Set recurring hours and exceptions
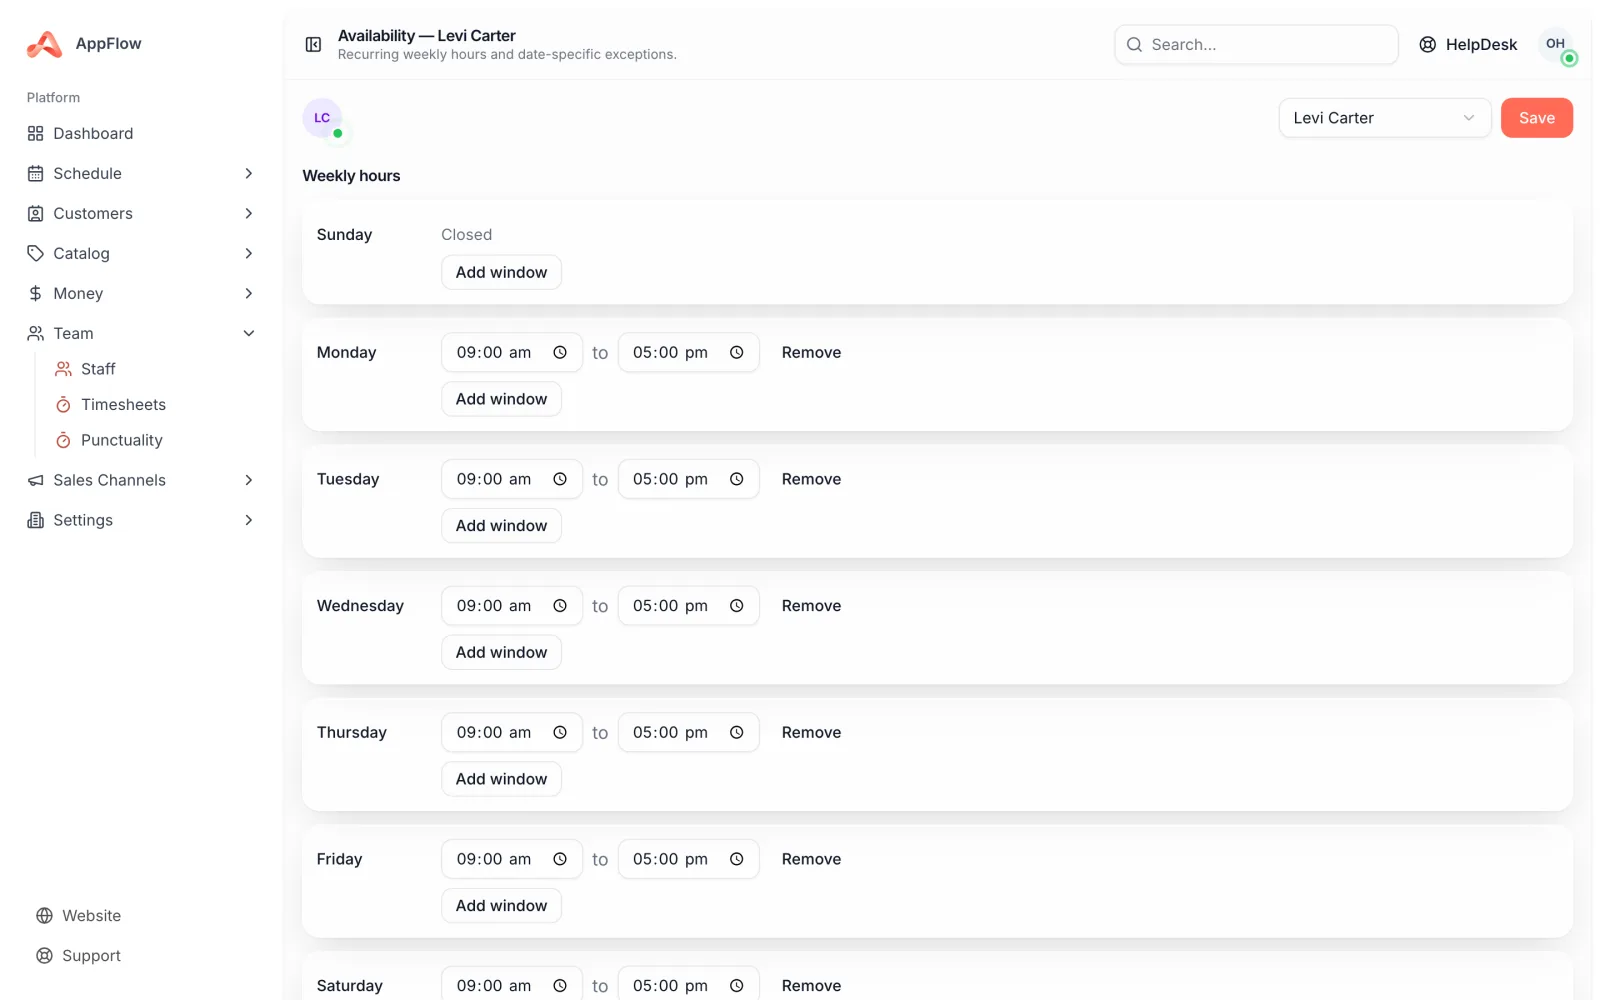
Available time slots come straight from the hours you set here. Start with the normal week, then add one-off exceptions for the days that are different.
- 1
Set recurring weekly hours
For each person, set the hours they usually work on each day of the week. These repeat every week and drive the times clients can book.
- 2
Add date-specific exceptions
For a public holiday, a late start or a day off, add an exception on that date. It overrides the recurring hours for that day only.
- 3
Check the available slots
Open the calendar to confirm the open times look right. What you see here is exactly what clients are offered.
Good to know
Exceptions always win over recurring hours, so a day off you add for one date will not change the rest of the year.
4. Choose who gets each job
When a client does not pick a person, AppFlow decides for you using rules you set in order. It works down the list until one rule fits, with a random catch-all at the end so every job lands with someone.
- Their previous team member, so regulars keep the person they know
- The least busy, to spread the work evenly across the team
- The next available, to fill the soonest open slot
- A specific person you choose for that service
- A random qualified team member as the catch-all
- 1
Open Allocation rules
In Scheduling, choose Allocation rules to see the ordered list.
- 2
Drag the rules into order
Put your preferred rule first. AppFlow tries each one in turn until it finds a qualified, available person.
- 3
Save your order
The catch-all sits at the bottom and only runs if no other rule fits, so no job is ever left unassigned.
5. Reassign a job when plans change
Days move around. When someone calls in sick or a job needs to swap hands, a manager can reassign it in a couple of taps.
- 1
Open the booking
Find the job on the calendar and open it.
- 2
Choose Reassign
Pick another qualified team member who is free at that time. The calendar updates straight away.
6. Track hours and export to Xero
Staff clock in and out as they work, and AppFlow adds up each person's hours for the period. When it is time to run payroll, send the totals to Xero in a few taps.
- 1
Have staff clock in and out
Each person clocks in when they start and out when they finish. Their worked hours build up automatically.
- 2
Review the totals
Open the period you want to pay and check each person's hours. Fix anything that looks off before you send it on.
- 3
Export to Xero
Choose Export to Xero and the shift totals flow through to payroll, so you are not retyping hours by hand.
That is your team and scheduling set up: the right people, the right hours, smart job allocation and clean payroll. From here, your calendar and online booking stay accurate on their own.
Was this guide helpful?
Still stuck? Contact us